Knowledge
The Undulating Periodization Strength And Size Program
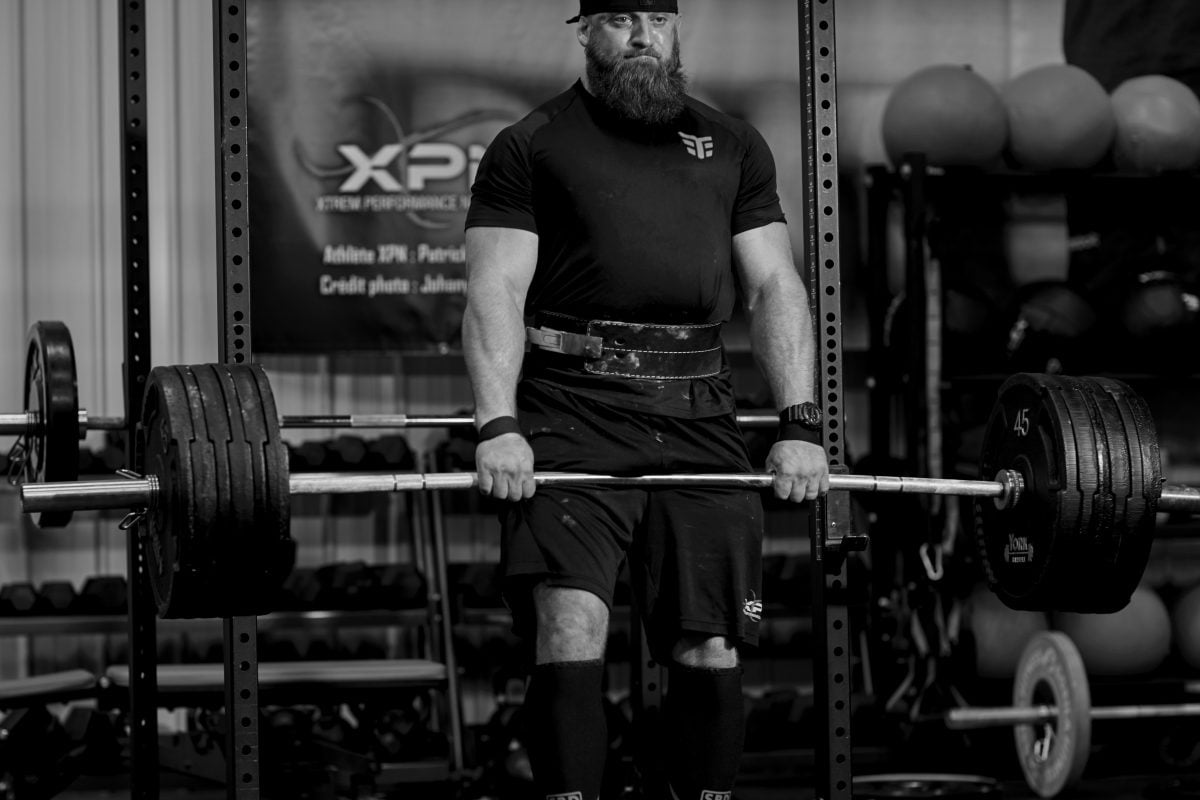
Articles, Muscle gain, Strength and performance
The Undulating Periodization Strength And Size Program
I’ve recently written articles on some of my favorite training methods. Specifically, wave loading , the 1/6 contrast, as well as rest/pauses and clusters. I have received many emails about how to use these methods/loading schemes in a periodized training plan. In other words, how I would organize them in a long-term plan.
You can’t say that I don’t think about you! Here is a 16-week training plan utilizing my favorite methods and loading schemes. It is a very straight forward plan, but it will work 100% of the time. Of course, just like with any other plans some people will progress more than others on it, it will be especially effective for neurotypes 2A and 1B.
Types 1A might have a harder time with the accumulation phases and might want to reduce the volume on the assistance exercises), for Type 2B it is a good method to build strength without crashing the CNS, although I won’t lie to you, the intensification phases will get tough by the 3rd week.
As for Type 3, it can work if they are advanced and decide to stick with the same exercises for the duration of the program. I will explain which modifications I would make to the various neurotypes at the end of the article.
Undulating Periodization
Periodization refers to dividing the training plan into phases or periods with a distinct objective/nature. The most well-known periodization model in North America is the linear model in which intensity (the weight used on average) is gradually increased throughout the whole training cycle while volume is gradually decreased. A typical (but simplistic) example would be something like:
- Phase 1 – Anatomical adaptations
3 sets of 12-15 per exercise
4 weeks
- Phase 2 – Hypertrophy
4 sets of 8-12 reps per exercise
4 weeks
- Phase 3 – Strength
4 sets of 4-6 reps per exercise
4 weeks
- Phase 4 – Power/Peaking
4 sets of 1-4 reps per exercise
2-3 weeks
Another approach, that has actually been shown to be more effective in most cases is undulating periodization, where phases of higher volume/lower intensity (accumulation) and of lower volume/higher intensity (intensification) are alternated.
For 3-4 weeks, you use methods focusing on muscular development (while still keeping somewhat of a neurological component to avoid losing those adaptations), and then for 3-4 weeks, you switch the focus to improving neurological factors while still maintaining some muscular work to maintain those adaptations as well. You then “undulate” back and forth between both types of training.
The benefits of this type of periodization are that it reduces the risk of overtraining because you train one system hard for a short period and then change your focus before that system has a hard time coping with the stress. By changing the nature of the program more often, you also keep the body more responsive to training.
For neurotypes 1B and 2A, this approach also has the benefit of being a lot less boring than repeating the same kind of work for a long time or making changes that are too small to actually feel different.
This program will thus alternate between 4 weeks of accumulation and 4 weeks of intensification for a total of four phases.
Accumulation 1 – 4 weeks
Intensification 1 – 4 weeks
Accumulation 2 – 4 weeks
Intensification 2 – 4 weeks
Loading For Each Phase
During an accumulation phase, the volume of work in the form of higher repetitions per set on average is higher, while the amount of weight lifted is lower. But keep in mind that I’m a size AND strength guy: the training I prefer will always have a component of both. So even during an accumulation phase, maybe 1/3rd of the workload will have an above-average neurological component to keep improving strength and performance while building muscle mass.
Along the same lines, during the intensification phases (which are heavier with lower reps) 20 or so per cent of the volume will be spent on a rep number that provides enough volume to continue building muscle tissue.
That’s why I love waves so much: they allow me to get work in both the muscular and neurological zones. As well, they are a lot less boring because every set feels different.
Here are the loading schemes used during each of the four phases. Note that each phase includes two loading schemes, you stay with one scheme for two weeks, then do the second one for two weeks (but the exercises stay the same for the four weeks).
- Accumulation 1
Week 1: 10/8/6/10/8/6
Week 2: 10/8/6/10/8/6
Week 3: 8/6/4/8/6/4
Week 4: 8/6/4/8/6/4
The two schemes being used are 10/8/6 and 8/6/4 waves. In all honesty, 10/8/6 waves do not offer the same advantages as other waves because they lack the neurological potentiation, or rather the fatigue from the higher reps balance out the activation so the second wave won’t have a better performance than the first wave.
But it still gives you the benefit of working mostly in the hypertrophy zone, stimulating maximum muscle growth, while still getting enough neurological stimulation from the sets of 6 to get an improvement in the CNS efficiency that will translate to strength gains.
The 8/6/4 wave is very powerful and prepares the body for the heavier lifting to come. It’s powerful because it is one of the best waves to build strength. It can be just as good as pure strength loading schemes because it has an important impact on the two most important elements in strength development: building muscle and improving CNS efficiency.
The sets of 8 are great for hypertrophy, the sets of 4 are solid for neurological gains and the sets of 6 provide decent gains in both.
- Intensification 1
Week 5: 6/4/2/6/4/2
Week 6: 6/4/2/6/4/2
Week 7: 5/4/3/2/1
Week 8: 5/4/3/2/1
This first intensification block uses the wave that I find the most effective at building strength: the 6/4/2 wave. It is so effective because you get:
– A great CNS efficiency improvement from the sets of 2 and 4
– A powerful potentiation effect from the sets of 2
– Enough growth stimulation to keep building muscle from the sets of 6
The sets of 2 are also less draining than maximum singles. So, they allow you to get maximum neurological improvement while putting a lot less stress on the CNS. Using HRV measures, a 2RM sets has almost 25% less stress on the nervous system as a 1RM while having almost the same effect on physical capacities.
Then we are using my favorite non-wave sets/reps scheme: the 5/4/3/2/1 countdown. Basically, you start with around 80% of your max and you do 5 reps then add weight on every set while also doing one less rep.
- Accumulation 2
Week 9: 7/5/3/7/5/3
Week 10: 7/5/3/7/5/3
Week 11: 1/6/1/6/1/6
Week 12: 1/6/1/6/1/6
We then get back to the second accumulation phase, and while the goal is to focus a bit more on muscular development, you will notice that 50% or so of the work is done in the neurological zone. You can see this phase as building the capacity to maintain a near-maximal force output for a longer time.
I use the sprinter analogy to explain that phase. A sprinter will first focus on building maximum speed by doing starts and 30-60m sprints. Once he has built top speed, you work on the capacity to maintain a high percentage of that top speed over 100m. That’s what we are doing in that phase: working on increasing strength in the 5-7 reps zone, the best to build muscle, while getting strong at the same time (functional hypertrophy).
So, we are using the 7/5/3 wave with the goal of using the same weight in week 9 as we did in week 6 for the 6/4/2 waves. And in the second week of this block (week 10), the goal is to be stronger for 7/5/3 than we were for 6/4/2.
Then we move on to the 1/6 system. Take the time to read the article about that scheme again. The sets of 1 are not max effort: you are using roughly 90% of your max. The sets of 1 are only there to potentiate the sets of 6. And remember, each set of 6 should be gradually heavier.
- Intensification 2
Week 13: 3 sets of Cluster 90% (4-6 reps)
Week 14: 3 sets of Cluster 92.5% (4-6 reps)
Week 15: 3/2/1 waves
Week 16: 3/2/1 waves
This last block utilizes the two loading schemes that I find to be the most effective at rapidly increasing your capacity to display strength: clusters and 3/2/1 waves. These are the two methods that have the greatest impact on your CNS efficiency.
They won’t build as much strength, because they have a lower effect on muscular development, but they are amazing at improving your capacity to take the strength you have built over the rest of the cycle and transfer it into a max effort performance.
Rapid Overview Of The Loading Schemes
Here’s how you approach those various loading schemes. Keep in mind that I don’t normally use percentages when I plan programs because they are not always accurate.
For example, the “average” person can get 6 reps with 85% of their 1RM. But if that person has a very high ratio of fast-twitch fibres in the muscles involved in the lift, they might only get 4ish reps with 85%. Someone with a high ratio of slow-twitch fibres might get 8 or even 10 reps with that load.
Similarly, if someone has always done high reps in training they will also get 8-10 reps with 85% because they are good with high reps and their 1RM will be lower than their potential because they haven’t done a lot of heavy lifting.
I’m only using percentages for illustration purposes to show how the load progresses from set to set. They also give you a good starting point, but you will need to adapt the load based on your capacities. Basically, each set should be really challenging, but not to failure, leaving around 1 rep in the tank.
So, here are some quick “how-to’s” of the schemes being used:
10/8/6 waves: Because of the higher volume, you accumulate plenty of fatigue during each wave. As a result, the second wave will not be heavier than the first one. In fact, normally we plan to hit a heavier first wave, and then go slightly lighter in the second one. However, if after the first wave you feel just as strong, you can try to keep the same weight for the second one.
So, it could look something like:
Set -1 (warm-up) 50% x 10
Set 0 (warm-up) 65% x 10
Set 1 (work set) 72% x 10
Set 2 (work set) 77% x 8
Set 3 (work set) 82% x 6
Set 4 (work set) 67-72% x 10
Set 5 (work set) 72-77% x 8
Set 6 (work set) 77-82% x 6
*note that in the second wave I include both possible outcomes: going down in weight or staying with the same weight.
The rest intervals are somewhat an individual thing but generally speaking, we will be using 90-120 seconds, keeping in mind that we will alternate two exercises, so you will get 4+ minutes between doing another set of an exercise.
8/6/4 waves: These are very similar to the 10/8/6 waves but they create less fatigue and have a greater potentiation effect on the nervous system. As such, the second wave should either be the same strength or slightly stronger depending on your training experience and fiber make-up. So, you either stay with the same weight or add around 5% in that second wave.
Set -1 (warm-up) 60% x 8
Set 0 (warm-up) 72% x 8
Set 1 (work set) 75% x 8
Set 2 (work set) 80% x 6
Set 3 (work set) 85% x 4
Set 4 (work set) 75-80% x 8
Set 5 (work set) 80-85% x 6
Set 6 (work set) 85-90% x 4
The rest intervals obey the same rule as for the 10/8/6 waves.
6/4/2 waves: This approach is similar to the two previous ones but since even less fatigue is created, the second wave should definitely be heavier than the first one, unless you were way too aggressive in that first one and you painted yourself in a corner. So, it should look like this:
Set – 2 (warm-up) 60% x 6
Set -1 (warm-up) 70% x 6
Set 0 (warm-up) 75% x 6
Set 1 (work set) 82% x 6
Set 2 (work set) 85% x 4
Set 3 (work set) 87.5% x 2
Set 4 (work set) 85% x 6
Set 5 (work set) 87.5% x 4
Set 6 (work set) 90% x 2
Again, remember that the percentages are only a recommendation.
I would still keep the rest intervals rule the same as for the previous two other wave types.
5/4/3/2/1 countdown: This is our first non-wave loading scheme and one of my favorite all-time approaches. Each of these 5 sets should be challenging but not an all-out effort; leaving at least 1 rep in the tank. The progression would look something like this (note that I use the warm-up sets to help me select the optimal starting weight for the work sets):
Set -2 (warm-up) 60% x 5
Set -1 (warm-up) 70% x 5
Set 0 (warm-up) 75% x 5
Set 1 (work set) 82% x 5
Set 2 (work set) 85% x 4
Set 3 (work set) 87% x 3
Set 4 (work set) 90% x 2
Set 5 (work set) 92% x 1
Once again, the rest intervals will be the same as it was mentioned before. It will only start changing slightly when we get to the 1/6 method.
1/6 contrast: we are using the 1/6 contrast in an accumulation phase, not an intensification one. So, the sets of 6 are obviously the key ones. The sets of 1, which are heavy but not maximal, are there to potentiate the sets of 6. The sets of 1 amp up the nervous system without creating any fatigue, which will boost performance for the upcoming set of 6 reps.
With the sets of 6, you should be able to add weight every time unless you were too aggressive at the start. If you know you won’t be able to get 6 reps in if you add weight, stick to the same load. But ideally, go up on each set of 6. On the other hand, the sets of 1 keep the same load each time: they are only there as a potentiation tool.
Set -3 (warm-up) 60% x 6
Set -2 (warm-up) 70% x 6
Set -1 (warm-up) 75% x 6
Set 0 (warm-up) 85% x 1
Set 1 (work set) 90% x 1
Set 2 (work set) 80% x 6
Set 3 (work set) 90% x 1
Set 4 (work set) 82.5% x 6
Set 5 (work set) 90% x 1
Set 6 (work set) 85% x 6
The rest intervals will be shorter after the sets of 1 rep. Potentiation peaks at around the 2 minutes mark, and we have a second lift to get in. So, I recommend resting 60-75 seconds after a set of 1 (then you do your set of 1 for the other lift). However, after the sets of 6 you need more rest to minimize fatigue, so you will take 90-120 seconds after those sets, which will give you about 4 minutes before you start a new set of 1 on an exercise.
Clusters: in a cluster you do a certain number of reps (here we are talking about 4 to 6) while giving yourself some rest between each repetition. Just to be clear, while you are resting between repetitions you don’t want to be under any muscle tension. So, if you are bench pressing, squatting or overhead pressing you rack the bar.
If you are deadlifting you leave the bar on the floor, if you are doing dips or chins, step-off of the apparatus. If you are doing a leg press or hack squat, rack and put the safety on. You get the point.
You will rest anywhere between 10 to 20 seconds (depending on the lift. The more demanding the lift, the longer you rest).
Once again, I give a percentage for illustration purposes. But you can adjust the weight depending on how it went. For example, if you reach 6 reps on a set, add weight on your next set. If you get 5, keep the same weight, if you only get 4 I would decrease the weight slightly.
It would look a little like this.
Set -3 (warm-up) 60% x 5
Set -2 (warm-up) 70% x 5
Set -1 (warm-up) 80% x 3
Set 0 (warm-up) 85% x 1
Set 1 (work set) 90% x 4-6 (1+1+1+1…)
Set 2 (work set) 90% x 4-6 (1+1+1+1…)
Set 3 (work set) 90% x 4-6 (1+1+1+1…)
For the clusters we want a long rest interval. Even though we are alternating two exercises, it remains a very demanding neurological method. So you will take a full 3 minutes of rest after a set, prior to moving on to the second exercise.
3/2/1 waves: you will notice that in the periodization guideline there are is no set prescription for the 3/2/1 wave; it’s open ended. You could do anywhere between 2 and 4 waves and it will depend on your progression.
When you do a 3/2/1 wave you can do a new wave every time you complete a wave. So if you were successful with your set of 3, you set of 2 and your set of 1 you start new, heavier wave.
The rules are:
– If you complete a wave, you start a new one
– Each wave has to be heavier than the preceding one
– If you fail to complete a set (e.g. only get 2 reps on the set of 3) you stop the exercise
– If you know you won’t be able to get the prescribed reps on the next set, stop the exercise
Here, depending on your neurotype and recovery capacity you will take between 2 and 3 minutes of rest after each set.
The Training Split
The training split will be fairly unconventional and uses 5 training days over a 7 days period. If you know you don’t recover well from 5 weekly workouts I suggest dropping the glutes/forearms session, which is more of a touch up since those muscles do get some stimulation on some other days.
The split is like this:
Chest/Biceps
Quads/Hams
Back/Triceps
OFF
Delts/Traps
Glutes/Forearms
OFF
Exercise Selection
Here you two options depending on your need for variation.
Option 1
You will keep the same exercises for the whole duration of the program. This is better for Type 3 and Type 2B. These guys have a higher anxiety level and do not need as much variation in their training, especially since they will be getting plenty of variation from the loading scheme.
Type 1A don’t have high anxiety but they don’t need as much variation either: as long as they feel like they can get a lift to go up even more, they can stick with it. So, a 1A can use either of the two options.
In which case I recommend these exercises:
Chest/Biceps day
A1. Bench press
A2. Biceps pulldown
B1. Incline bench press
B2. Standing barbell curl
C1. Pec deck machine
C2. Preacher curl
Quads/Hams day
A1. Back squat
A2. Lying leg curl
B1. Bulgarian split squat
B2. Single-leg curl
C1. Hack squat or leg press
C2. Back extension or Glute-ham raise
Back/Triceps day
A1. Seal row
A2. Close-grip bench press
B1. Neutral grip pull-up (or lat pulldown if not strong enough)
B2. Dips
C1. Straight-arms pulldown
C2. Floor DB triceps extension
Delts/Traps (and rear delts) day
A1. Military press
A2. Power shrugs
B1. Neutral grip high incline DB press (60 degrees angle)
B2. DB shrugs (slight forward lean)
C1. DB lateral raise
C2. Face pull
Glutes/Forearms day
A1. Romanian deadlift (wear straps)
A2. DB hammer curl
B1. Glutes pull-through
B2. EZ bar reverse curl
C1. Prowler pushing (low handles)
C2. Fat bar (or Fat Gripz) curl
Option 2
In this second option, you will change exercises once during the cycle. You do Accumulation 1/Intensification 1 with one set of exercises then Accumulation 2/Intensification 2 with another set of exercises. This will work better for the neurotypes 1B and 2A who crave more variation.
In which case I recommend these exercises:
Chest/Biceps day
A1. Bench press / Floor press
A2. Biceps pulldown / Close-grip supinated chin-ups
B1. Incline DB press/ Incline bench press
B2. Standing DB curls / Standing barbell curl
C1. Pec deck machine / DB power flies
C2. Preacher DB curls / Preacher curl
Quads/Hams day
A1. Back squat / Front squat
A2. Lying leg curl / Seated leg curl
B1. Bulgarian split squat / Single-leg press
B2. Single-leg curl / Lying leg curl 2/1 technique
C1. Leg press / Hack squat
C2. Back extension / Glute-ham raise
Back/Triceps day
A1. Seal row / Chest-supported T-bar row
A2. Close-grip bench press / top half bench press from pins (starting at elbows 90 degrees)
B1. Neutral grip pulldown / Neutral grip pull-up
B2. JM press / Dips
C1. Straight-arms pulldown / EZ bar pullover
C2. Lying EZ bar triceps extension / Floor DB triceps extension
Delts/Traps (and rear delts) day
A1. Military press / Push press
A2. Power shrugs / Snatch grip high pull from the hang
B1. Neutral grip high incline DB press (60 degrees angle) / Top half shoulder press from pins (forehead level)
B2. DB shrugs (slight forward lean) / Barbell shrugs (slight forward lean)
C1. DB lateral raise / Barbell front raise
C2. Face pull / Elbows-out seal row
Glutes/Forearms day
A1. Romanian deadlift / Sumo deadlift
A2. Rope hammer curl / DB hammer curl
B1. Glutes pull-through / Reverse hyper
B2. EZ bar reverse curl / Zottman curls
C1. Prowler pushing (low handles) / I’d keep it in
C2. Fat bar reverse preacher curl / Fat bar (or Fat Gripz) standing curl
There you have it! This is a perfect example of how I would periodize my favorite loading schemes into a structured plan. The plan given will be amazingly effective, but you can change the exercises for movements you find work best for you, as long as you respect the basic principles and structure.
-CT